 |

Popular Alternative Choice
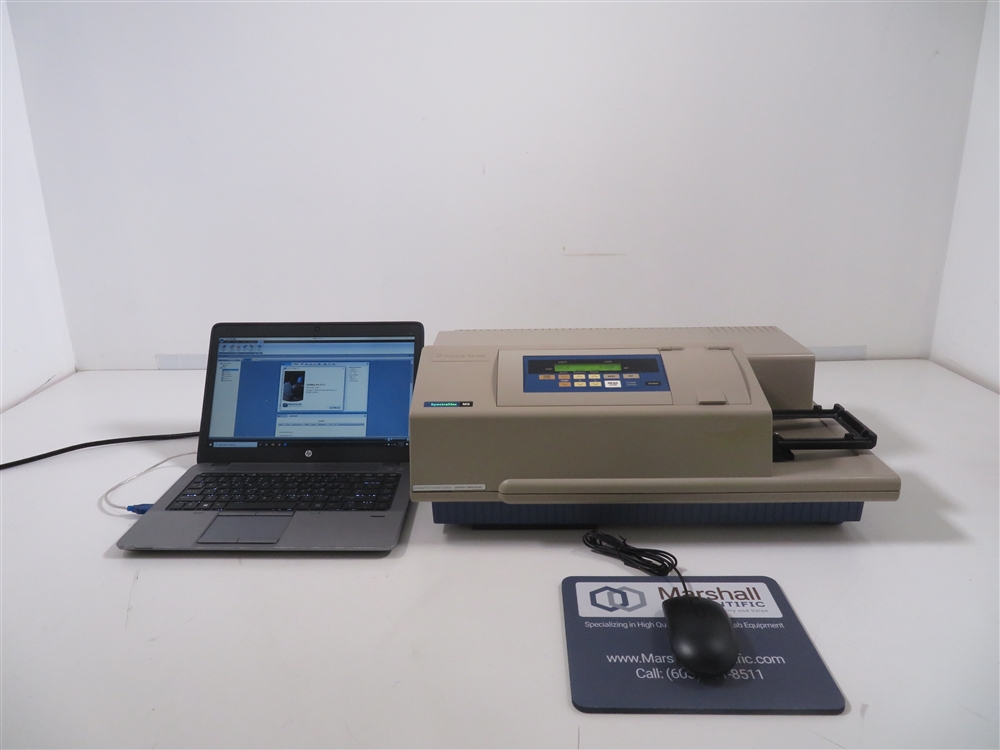
Molecular Devices SpectraMax M5 Multi-Mode Microplate Reader
- Five preferred modes for diverse bioresearch applications.
- No filter change with dual monochromator optics.
- Flexible for 6-well to 384-well microplates and cuvettes.
- Key applications: ELISA, nucleic acid, endotoxin testing.
Go to Product Details
Fully Recertified!
Eppendorf BioPhotometer Model #6131
Measuring Wavelengths
Xe 230, 260, 280, 320, 562, 595 nm
Accuracy of Reading
0.001 A
Wavelength Random Error
≤ 0.1 nm
- Rapid, simple, and convenient measurement for nucleic acids, proteins, and bacteria density
- Single-beam photometer with reference beam and fixed wavelengths
- Efficient and reliable operation in the lab with exceptional repeatability
- High-quality components ensure operating reliability
- Metal housing for stability
- Fully tested to perform at factory specifications before shipping
- Includes Calibration Certificate, Power Cord, Operator's Manual, and Full 180 Day Parts and Labor Warranty
- Optical system: Absorption single-beam photometer with reference beam and several fixed wavelengths
The Eppendorf BioPhotometer Model #6131 is used for rapid, simple, and convenient measurement of many different research methods including measurement of nucleic acids, proteins, and bacteria density through photometric principles. The single-beam photometer with reference beam and several fixed wavelengths make this photometer extremely efficient
within the lab with exceptional reliability and repeatability. The high quality components guarantee high operating reliability while the metal housing ensures operating stability.
The Eppendorf BioPhotometer Model #6131 is fully tested to perform at factory
specifications before being shipped.
The Eppendorf BioPhotometer Model #6131 includes:
- > Calibration Certificate
- > Power Cord
- > Operator's Manual
- > Full 180 Day Parts and Labor Warranty
Eppendorf BioPhotometer Model #6131 Specifications
|
Optical system
|
Absorption single-beam photometer with reference beam and several
fixed wavelengths
|
|
Irradiation source
|
Xenon flash lamp
|
|
Spectral dispersion
|
Holographic concave grating
|
|
Measuring wavelengths
|
Xe 230, 260, 280, 320, 562, 595 nm
|
|
Wavelength selection
|
Method-dependent, program controlled
|
|
Spectral bandwidth
|
5 nm at 230 to 320 nm
7 nm at 562 to 595 nm
|
|
Wavelength systematic error
|
±
1 nm at 230 to 280 nm
±
2 nm at 320 to 595
|
|
Wavelength random error
|
≤
0.1 nm
|
|
Photometric random error
|
≤
0.002 A at 0 A
≤
0.005 A at 1 A
|
|
Photometric systematic error
|
±
1% at 1 A
|
|
Accuracy of reading
|
0.001
A
|
|
Stray-light proportion
|
<
0.05%
|
|
Radiation detector
|
Silicium
photo diodes
|
|
Memory
|
12
preprogrammed, modifiable method programs
|
|
Supply voltage
|
100
to 240 V ± 10%: 50 to 60 Hz
|
|
Dimensions (W x H x D)
|
20
x 32 x 10 cm
|
|
Weight
|
3
kg
|
- Confirm the power supply and PCB output correct, stable voltages across all required connections
- Inspect the display for any dim or dead pixels; replace affected components to maintain full visual clarity and operational accuracy
- Verify full functionality of all buttons, ensuring precise and responsive input control
- Check the XY assembly for proper movement and alignment; thoroughly clean all railings, removing any debris or contaminants
- Confirm stable software communication and connection between the instrument and PC, addressing any connectivity issues
- Inspect and clean or replace all filters as required to ensure optimal airflow and performance
- Examine internal wiring and electrical connections for any breaks, disconnections, or tears; replace or secure any compromised wiring
- Test the lamp’s full functionality, replacing it if any performance issues, dimming, or faults are detected
- Execute the necessary validation protocol, documenting completion with a date on a calibration/verification certificate
- Perform and verify appropriate updates to the PC operating system for compatibility and security
- Conduct a thorough cosmetic inspection, ensuring all external components meet quality and aesthetic standards
Technician Inspection and Recertification Checklist: Instruments
The Following Checklist Is to Be Performed on All Incoming and Outgoing Pieces of Equipment
|
Task
|
Completed?
|
Remarks?
|
|
Confirm stable, correct voltage outputs from power supply and PCB
|
Completed
|
|
|
Inspect display for dim or dead pixels; replace as needed
|
Completed
|
|
|
Verify functionality of all buttons for precise, responsive control
|
Completed
|
|
|
Check XY assembly for proper movement; clean railings to remove debris
|
Completed
|
|
|
Confirm stable software communication between instrument and PC
|
Completed
|
|
|
Inspect and clean or replace filters to maintain optimal performance
|
Completed
|
|
|
Examine internal wiring for damage; replace or secure compromised connections
|
Completed
|
|
|
Test lamp functionality; replace if dimming or faults are detected
|
Completed
|
|
|
Execute validation protocol and document on calibration/verification certificate
|
Completed
|
|
|
Update PC operating system for compatibility and security
|
Completed
|
|
|
Conduct cosmetic inspection to ensure quality of external components
|
Completed
|
|
To View More of Our Recertification Protocol Click Here
|
|
 |
